![GS Logo-GS platform.png]](https://support.govspend.com/hs-fs/hubfs/GS%20Logo-GS%20platform.png?height=25&name=GS%20Logo-GS%20platform.png)
Once the connection is established, it’s time to move on to the configuration. Head back to the Configuration page to get started.
Selecting GovSpend Record Types
-
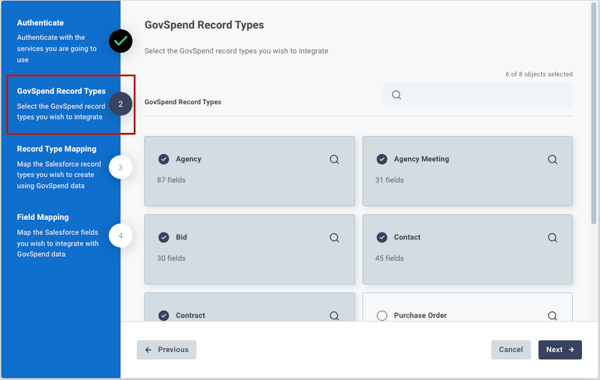
This step allows you to specify exactly which broad datasets you want to make available to your team.
-
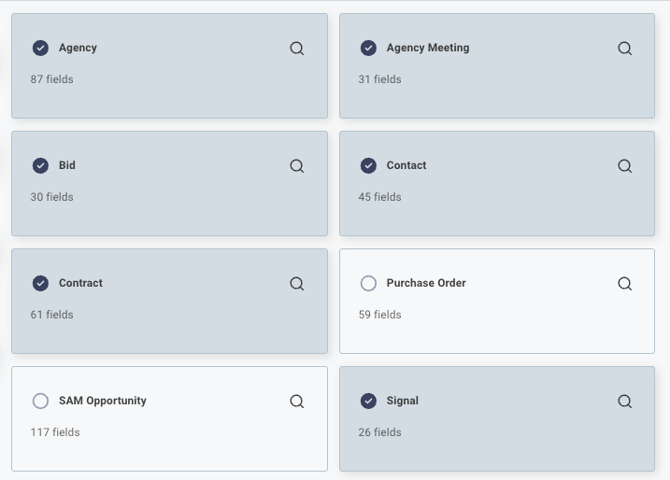
Click to select each dataset you would like to integrate (Currently available: Bids, Contacts, Contracts, Agency Meetings, Spending Line Items, Agencies, Federal SAM Opportunities, and Opportunity Signals).
-
Your selections here determine where in GovSpend your team will see the "Add to CRM" button.
-
Click Next. (Note: You can always come back and add more datasets later!)
Record Type Mapping (Source to Destination)
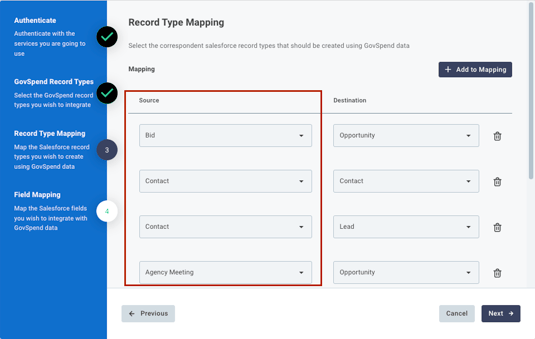
Here, you will tell the system where the GovSpend data should live once it enters your CRM.
-
Look at the Source column for the datasets you selected in Step 3.
-
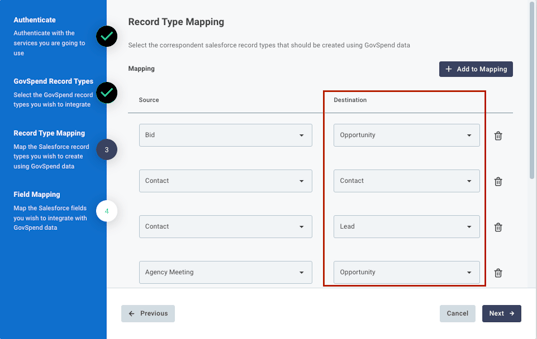
In the Destination column, select the corresponding CRM object.
-
Salesforce options: Contact, Lead, Opportunity, or Custom Objects.
-
HubSpot options: Contacts, Deals, or Custom Objects.
-
-
Example: If your Source is "Bids" and your Destination is "Opportunity," any bid pushed from GovSpend will be created as a new Opportunity in your CRM.
-
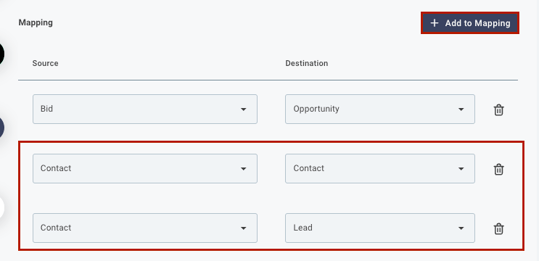
Pro-tip: You can map a single source to multiple destinations! Just click "Add Mapping" (e.g., mapping a GovSpend Contact to both a CRM Contact and a CRM Lead).
Field Mapping (The Nitty-Gritty)
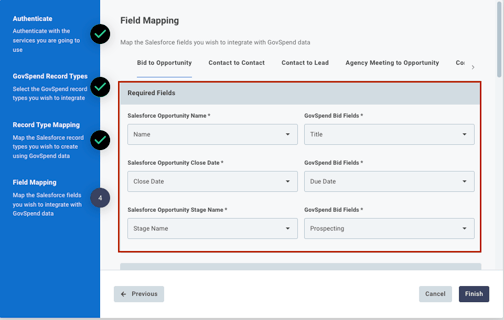
This is where you configure exactly how individual data points flow from the GovSpend record into your selected CRM object. You will need to review the mapping for each Source -> Destination combination you created in Step 4. Each combination will have its own tab.
- Required Fields: These are fields your CRM absolutely requires to create the destination object. You cannot remove these, but you can use the dropdown to change which GovSpend field populates them.
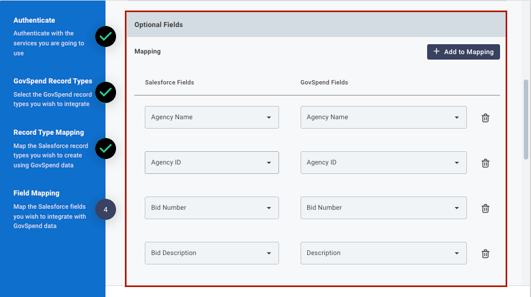
- Optional Fields: Click "Add to Mapping" to pass additional data points through. Use the dropdowns to match the CRM field to the GovSpend field.
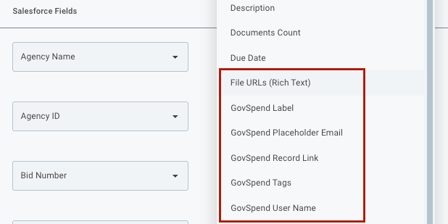
Highly Recommended Custom GovSpend Fields: We've created a few integration-specific fields to help you organize and track your ROI once the data is in your CRM. We highly recommend mapping these:
- GovSpend Label: Sends "GovSpend" as the field value. Perfect for tracking the source of the data in your CRM reporting.
- GovSpend Record Link: Sends a direct URL back to the GovSpend details page so reps can easily jump back in for deeper research.
- GovSpend User Name: Notes which specific user on your team pushed the record.
- File URLs (Rich Text): Sends URL links of any files attached to a GovSpend record (Bids, Contracts, Meetings). Note: You must map this to a corresponding "Rich Text" field in your CRM!
Once you've mapped all your tabs, click Finish. You're officially ready to start integrating data! Any future changes you want to make to your mappings can be done simply by clicking "Reconfigure."